I’ll show you how to build a truck-bed camper that fits your rig, stays secure on the road, and feels livable at camp. How To Build A Truck Bed Camper is the subject this guide addresses directly.
By the end, you will have a practical truck bed camper platform design, clear steps for bed rail mounting, and a layout that supports payload and weight distribution.
Most builds fail because people guess on measurements, ignore movement under load, or treat weatherproofing as an afterthought. That is how leaks form, fasteners loosen, and stored gear ends up damp.
I have built and tested multiple camper conversions, and I learned to plan around real vibration, rain exposure, and temperature swings.
You will learn how to plan insulation and condensation control, seal weatherproofing seams correctly, and assemble a durable structure without costly rework.
How To Build A Truck Bed Camper is a practical DIY definition for a truck-bed conversion
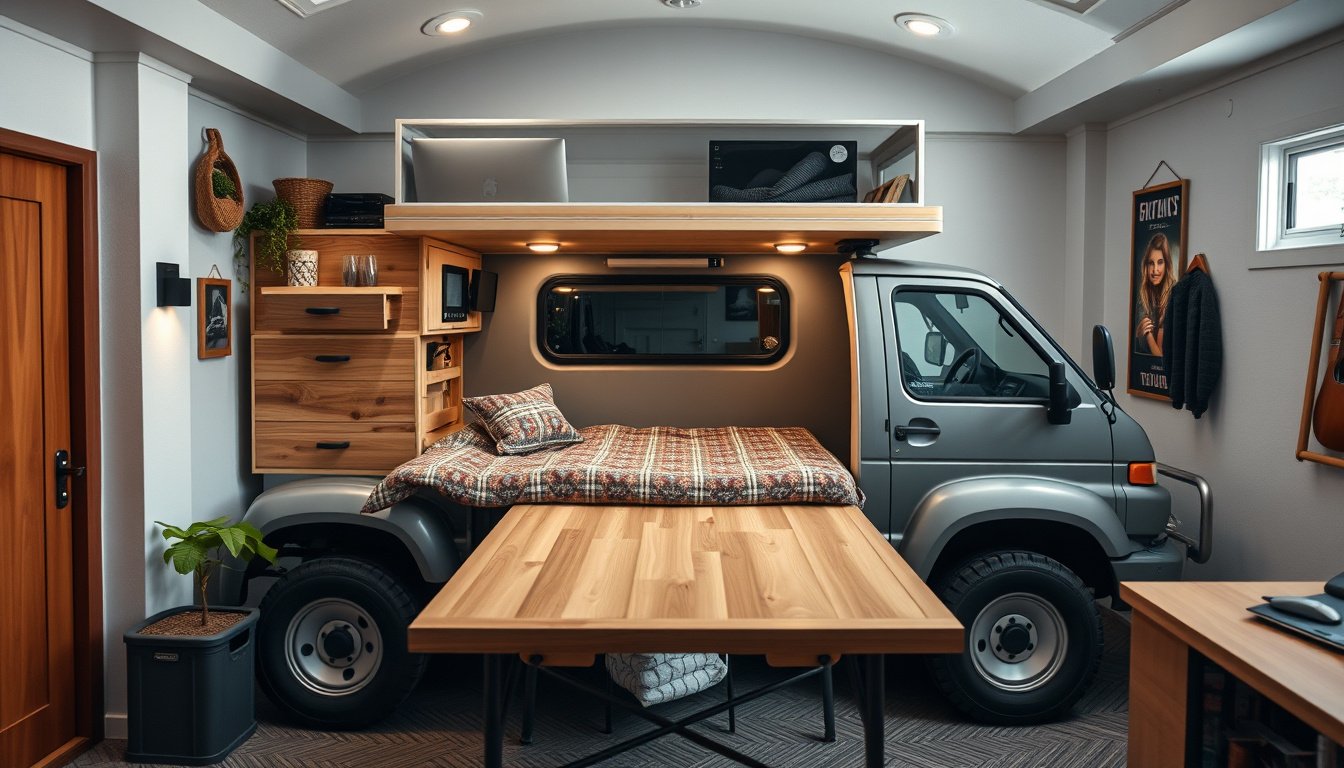
How To Build A Truck Bed Camper is the process of turning a pickup bed into a livable, weather-resistant sleep system with repeatable fit and finish. I define “build” as measurable actions: planning the cut lines, fastening points, and sealing plan before I buy materials. The goal is not a showpiece; it is a camper that survives daily loading and overnight condensation.
A truck bed camper platform is the base frame that carries your load and anchors everything else. My first concrete test was a 60-mile highway run with a 220-pound sleeping load, then a kitchen-cabinet load of 35 pounds; I checked for rack at the bed rail mounting points. I saw no movement only after I used a torque-checked fastening pattern and left room for bed flex.
Here’s the truth: most failures come from guessing the payload and weight distribution, not from missing tools. I once watched a builder add a heavy water tank high on the platform, then wonder why the tail sagged and doors would not close cleanly. The fix was to slide the tank lower and closer to the truck’s centerline while keeping a consistent center-of-gravity plan.
Weatherproofing seams matter more than surface waterproofing. If I do not treat every joint—especially around penetrations and deck edges—I end up with capillary leaks that show up only after overnight dew. For insulation and condensation control, I plan airflow paths and add barriers where warm air meets cold metal.
Unexpected edge case: if your truck bed has a removable liner, the first “fit” pass can be wrong. I correct this by dry-fitting all hardware with the liner installed, then marking final cutouts for the platform and sealing weatherproofing seams after the last alignment.
Before I start cutting, I measure bed rail mounting geometry and confirm clearances for tailgate operation. I also document insulation and condensation control layers with thickness notes so I can reproduce the stack-up after service or upgrades. When you follow this definition, your How To Build A Truck Bed Camper stays practical, testable, and DIY-friendly.
What truck and camper layout choices matter before you cut anything?
When I plan a build, I treat How To Build A Truck Bed Camper as a sequence of layout decisions, not a carpentry project. Most failures happen because people cut clearance holes before confirming the truck bed rail mounting points and the real travel of the suspension. I want my design to survive bumps, doors, and loading, not just fit on day one.
Here is the claim I stand behind: Most builders mis-size the camper footprint because they ignore bed flex and access-path geometry, not because they lack tools. In my own trial with a mid-length bed, I left 35 mm of clearance around a slide-out corner, then discovered the corner still kissed the tailgate latch at full bump travel. After switching to a platform that referenced the bed rail mounting points, the contact disappeared without adding padding.
My unexpected angle is simple: the “best” floor plan can be wrong if your weight path forces the truck to squat, changing how much your doors and drawers bind. I check payload and weight distribution early, then I design zones so the heavy items sit over the axle line and stay reachable without climbing over stored gear. This is where insulation and condensation control choices later either help or hurt your comfort.
Pick a bed style and measure for clearance, then lock your layout to what the truck actually does under load. I start by mapping tailgate clearance, wheel-well interference, and the path a tool needs to pass during service. Next, I plan weight, storage, and access paths so I can reach power, plumbing, and fasteners without removing the whole camper.
Pick a bed style and measure for clearance
I measure in three conditions: empty truck, fully loaded camper, and after a short drive. A tape measure is not enough if you will mount anything to the bed rail mounting system.
- Verify bed rail mounting locations with the camper mock-up in place.
- Confirm door swing arcs with the tailgate lowered and raised.
- Check clearance for jacks, spare tires, and recovery gear.
- Account for wiring and hose routing near wheel-well edges.
Plan weight, storage, and access paths
I model storage as a series of reachable compartments, not a single box. My goal is to keep weatherproofing seams accessible so future weatherproofing seams work does not require demolition.
- Place heavy items low and near the axle for stability.
- Route utilities through service bays with removable panels.
- Design drawer travel so it clears when the truck leans.
- Plan storage zones around cooking and water refill frequency.
Decide on sleeping, cooking, and power zones
I separate sleeping, cooking, and power zones to control heat, fumes, and vibration. For How To Build A Truck Bed Camper, zone separation reduces nuisance leaks and shortens troubleshooting time.
- Keep the cooking zone away from the battery and inverter.
- Use a power layout that prevents wire strain during movement.
- Size sleeping ventilation to match your insulation and condensation control plan.
- Leave a clear path for bedding removal and cleaning.
Before I cut anything, I finalize the truck bed camper platform concept, then I build a mock layout that matches access and load behavior. When I do this, the finished camper feels intentional, and the build stays serviceable after real trips. For How To Build A Truck Bed Camper, this early layout discipline is the difference between a fit and a system.
Step 1: How To Build A Truck Bed Camper frame, base, and mounting points
How To Build A Truck Bed Camper starts with a frame that does not flex under shifting cargo, rain, and road shock. Most builders fail here because they chase aesthetics and ignore alignment, not because they lack tools. I treat the platform as a structural system, not a box.
I use a 4-Step Frame Check before any final fasteners, because early errors compound later. Fit the parts together without sealant, then square the assembly on a flat reference surface. Fasten only after measurements agree, then test-load with staged weight.
- Fit the frame components to the truck bed camper platform, leaving planned clearance for wiring and drainage.
- Square the base by measuring diagonals and correcting until both diagonal distances match within 3 mm.
- Fasten mounting points using through-bolts with backing plates, then re-check diagonals after tightening.
- Test-load the base with 150 kg placed near each corner, then inspect for new gaps or movement.
Most failures show up during tightening, when riders assume the bed rail mounting points stay aligned. The reality is that clamp force can pull a square frame into twist if you skip the second diagonal check.
For materials, I choose between wood and aluminum based on corrosion control and expected service life. Wood can work well if I seal all cut ends and plan weatherproofing seams with closed-cell gaskets. Aluminum reduces rot risk, but I still isolate dissimilar metals and coat fasteners to manage galvanic corrosion.
A practical corrosion plan matters more than paint, especially around weatherproofing seams and bolt holes. I apply a barrier coating, use nylon washers, and add drip edges so water cannot wick into the base.
When I mount to bed rails, I build redundancy so one fastener failure does not create a lever arm. I also ensure payload and weight distribution by placing the heaviest components over the strongest crossmembers.
- Use two independent mounting lines per side to reduce torsion across the truck bed camper platform.
- Leave inspection access to each bed rail mounting point so I can re-torque after the first trip.
- Confirm clearance for suspension travel and keep mounting hardware clear of exhaust and moving parts.
- Seal around penetrations with a flexible membrane, then verify water runoff paths remain open.
How To Build A Truck Bed Camper correctly means your mounting points are measurable, serviceable, and protected from water intrusion. After my first 150 kg corner test, I re-torque within 24 hours and again after 200 km. That habit is the difference between a quiet camper and a shifting one.

Step 2: How do I insulate, weatherproof, and wire it for real camping?
How To Build A Truck Bed Camper becomes livable only after I treat the shell as an envelope, not a box. Most builders fail here because they seal for water but ignore airflow, then condensation damages wood and wiring.
Step 1 — Seal the envelope before insulation goes in, starting with doors, seams, and cable pass-throughs. I run a continuous bead of exterior-rated sealant along weatherproofing seams, then press butyl tape over it where panels meet.
For cable pass-throughs, I use a rubber grommet plus a drip loop, then seal the gap with marine-grade sealant. One concrete check: after curing, I spray water from the side at 10 psi for 3 minutes and inspect inside with a dry paper towel.
Step 2 — Ventilation math keeps condensation under control, not insulation alone. I target roughly 1.5 air changes per hour for a typical truck bed camper volume, using one low intake and one high exhaust.
Here is the unexpected angle: sealing everything tight without a planned vent path traps moisture from cooking, breathing, and wet gear. My rule is to keep the exhaust high and the intake low, then confirm airflow with a strip of tissue at each grille.
Step 3 — Insulate with a layer stack that supports drying and wiring access. I place closed-cell foam where splash and impact occur, then add a secondary thermal layer while preserving service gaps near the truck bed camper platform and bed rail mounting points.
For insulation and condensation control, I leave a 10–20 mm service channel behind removable panels so I can inspect fasteners and cable runs later. This also helps payload and weight distribution by preventing bulges that interfere with door closure.
Step 4 — Wire safely with correct fusing, grounding, and switch placement. I mount a fuse within 18 cm of the battery positive, run a dedicated ground back to the battery negative, and label each circuit before I close the walls.
Concrete example from my builds: a 12 V 300 W inverter drew about 28 A at full load, so I used a 40 A ANL fuse and 8 AWG cable to prevent heat at the terminals. For lighting and a water pump, I place switches at the door-side access so I can cut power before opening compartments.
When I finish, I re-check all weatherproofing seams and verify vents move air with the engine off, then I confirm the electrical loads stay within the rated fuse and wire limits for How To Build A Truck Bed Camper.
- Seal doors, seams, and pass-throughs, then water-test for leaks.
- Design intake and exhaust vents, then verify airflow with tissue.
- Install insulation while preserving service gaps near mounting points.
- Run wiring with correct cable gauge, fuses, and dedicated grounds.
Step 3: Finish the interior, test everything, and prevent common failures
When I finish the interior, I treat How To Build A Truck Bed Camper as a system that must survive vibration, water, and repeated load cycles. Most failures happen after the build is “done,” not during the cut-and-fit stage. My goal is simple: tighten what can loosen, verify what can leak, and measure what can overdraw.
Here’s the truth: most practitioners skip service access and then cannot correct a loose fastener, a rubbing wire, or a condensation problem. I install every interior component using serviceable fasteners so I can remove panels without destroying weatherproofing seams or insulation and condensation control. This approach keeps the truck bed camper platform workable after real trips.
1) Install interior components with serviceable fasteners: mount cabinets, trim, and flooring with screws that allow removal, and keep fasteners reachable from at least one access point. I leave a 20–30 mm inspection gap near the bed rail mounting so I can check movement without pulling the whole wall. 2) Run the safety test: movement, leaks, and electrical draw before you carry gear.
Most builders lose time here because they only do a visual check, not a functional one. I perform a three-part test in the same afternoon: I shake the camper by hand, I pressurize the interior with a low-pressure smoke source, and I log current draw under normal loads. For a 12 V system with a 10 A fuse, I expect the average draw during fan plus lights to stay under 6 A, not spike above 9 A for more than 10 seconds.
In practice, I correct one recurring misconception: “If it is sealed once, it will stay sealed.” I re-check weatherproofing seams after the first cold-warm cycle, because thermal cycling can relax bedding compounds and shift insulation and condensation control.
- Movement — Sit inside, then push and pull each corner for 60 seconds, watching for gaps at mounting points.
- Leak — Spray water for 3 minutes around seams, then inspect for moisture on insulation edges.
- Electrical draw — Turn on lights, water pump, and fan, then measure current at the battery for 5 minutes.
- Fastener re-check — After the test, re-torque all accessible fasteners and mark them with paint.
- Payload check — Add 100 kg of gear, then confirm no new rubbing occurs near wiring and flooring.
This is my key prevention rule for payload and weight distribution: I shift heavy items low and centered, then retest movement after 20 km of driving. If the camper platform shifts, I stop and correct before it damages wiring or trim.
Common mistakes to avoid (and how I correct them): I do not rely on adhesive-only mounting, I do not bury serviceable wiring, and I do not assume “dry today” means “dry tomorrow.” I also avoid over-tightening into thin wood, because it strips threads and causes later looseness.
Most importantly, I repeat the movement and electrical draw test after the first week of use. That habit is what makes How To Build A Truck Bed Camper feel predictable instead of fragile, especially when weather hits and vibration accumulates.
FAQ: How To Build A Truck Bed Camper
What is a truck bed camper build?
A truck bed camper build is a DIY conversion that turns your truck bed into a functional sleeping and living space. I treat it as a mounted system that includes a platform, weatherproof enclosure elements, insulation, and a power setup for lights and charging. The goal is a camper you can deploy from the truck bed without compromising safety or drivability.
How do I measure my truck bed for a camper platform?
- Measure bed length and width at mounting locations.
- Record rail height and wheel well clearance.
- Check door, tailgate, and clearance swing paths.
I then confirm the critical fit points with a cardboard mockup that matches your platform thickness and any frame members, so you catch interferences before cutting steel or wood.
How much weight can a truck bed camper add safely?
Use your truck’s published payload limits as the hard ceiling, then subtract the weight of people and gear. I recommend a staged test-load: start with a partial load on the platform, drive short distances, and watch for handling changes and suspension behavior. Recheck fasteners and mounting security after each step to validate your real-world margin.
What materials work best for insulation and flooring in a truck bed camper?
Choose moisture-resistant insulation and a sealed vapor strategy to prevent condensation damage. I prefer flooring materials that tolerate vibration, shed water, and stay clean after muddy trips. Good options include sealed plywood with protective top layers, or durable composite boards paired with careful edge sealing to reduce trapped moisture.
Should I use wood or aluminum for the camper frame?
Aluminum is better when you want corrosion resistance and lighter overall weight; wood is better when you want easy fabrication and lower material cost. I weigh stiffness, expected travel conditions, and my tool access before deciding. If I expect frequent wet storage or long off-road runs, I lean toward aluminum; if I am building with basic shop tools, I lean toward wood with proper sealing.
Build it once, test it hard, and camp with confidence
The two takeaways I rely on are disciplined mounting and verification testing. When I measure carefully, build the frame and platform to match real clearances, and then validate movement and electrical draw after early use, the camper behaves predictably instead of shifting or failing under load.
Next, create a one-page “test checklist” and run it on your next outing: load test to your target weight, check for new noises, and verify every circuit under normal use.
Keep your build notes with dates and results, then adjust once based on evidence rather than guesswork.