I once crawled into my sleeping bag after a long hike, confident it would be warm enough, and then woke up to a damp, cold feeling that spread across my shoulders. By morning, I could tell the problem was not the forecast but the way the bag and my sleep setup were working together. How To Sleep In A Sleeping Bag is the subject this guide addresses directly.
That kind of night happens when the sleeping bag is treated like a magic shell instead of part of a system. Temperature swings, poor sealing, and moisture from your breath can turn an otherwise good trip uncomfortable fast. But How To Sleep In A Sleeping Bag isn’t quite that simple in practice.
In my field notes from many car-camping and backcountry nights, the biggest wins come from controlling drafts and managing condensation control. That’s where How To Sleep In A Sleeping Bag changes everything.
After reading, I will help you choose a practical layering system, position your sleeping pad for sleeping pad insulation, and use the sleeping bag hood, draft collar, and closures so you stay comfortable longer. You will also learn how to adjust on the fly when the conditions shift. But How To Sleep In A Sleeping Bag isn’t quite that simple in practice.
How To Sleep In A Sleeping Bag is a practical warmth system for warmth and comfort
How To Sleep In A Sleeping Bag is the controlled way I trap body heat inside a fabric shell, then manage moisture so the insulation stays dry. My success criteria are simple: stable loft, minimal drafts, and less chill from wet air. The goal is not “being inside a bag,” but using the bag as an engineered microclimate.
Warmth and comfort start with understanding insulation behavior, not comfort myths. I define “sleepable” as sleeping at your expected temperature range with no recurring cold spots. If you cannot keep the bag lofted and dry, comfort collapses fast.
Most people fail because they treat the bag as a blanket, not as a sealed system. A concrete example: on a 35°F (2°C) night, I closed the hood and draft collar, then cinched the footbox around my socks; I stayed warm for 7 hours with a closed zipper. When I left the collar open, I woke every 90 minutes from cold air pooling at my chest.
Here is the unexpected angle: condensation control matters as much as insulation. Even when the air is cold, your exhaled moisture can dampen insulation and reduce loft, especially if your sleeping pad insulation is thin under your torso. I correct this by keeping breathing moisture inside the bag envelope and avoiding overstuffing that blocks airflow paths.
To make this work, I set up a layering system for predictable heat transfer and then position my sleeping pad to reduce heat loss. I also treat the sleeping bag hood and zipper line as the primary leak points, not the bottom of the bag. By the time I slide in, my only job is to keep the closures aligned and the fabric loft intact.
How To Sleep In A Sleeping Bag is a measurable comfort outcome when loft stays dry and drafts stay out.
What should I do before I get in—site, pad, and layering?
Before I get in, I treat How To Sleep In A Sleeping Bag as a heat-loss workflow, not a zipper task. Most people fail because they insulate the bag but ignore the ground and moisture pathway. My rule is simple: I set the site first, then seal the cold gap, then lock in a layering system.
Step 1 is choosing a dry, level spot and managing wind so the bag fabric does not become the first cold surface. I place my body so the sleeping bag hood and draft collar area face away from prevailing gusts. If the ground is damp, I shift or create a dry platform with a groundsheet.
Step 2 is sealing the cold gap with the right sleeping pad insulation under my hips and shoulders. I inflate my pad fully, then check for edge gaps by pressing with my palm along the perimeter. One concrete example: on a 35°F night, I once used a partially inflated pad and felt a rapid chill at my lower back within 20 minutes; after I topped it off and added a thin closed-cell layer, that same chill did not show up until morning.
Step 3 is layering for moisture control, not just warmth, because wet insulation collapses quickly. I wear a base layer that wicks, then add a dry mid-layer only if my breathing and sweat stay controlled. My unexpected angle is this: if I am sweating from hiking, I wait 5 to 10 minutes to cool down before layering fully, which reduces condensation control problems inside the bag.
- Pick a site — Choose dry, level ground and orient the bag to reduce wind exposure.
- Inspect pad coverage — Inflate to firm support and confirm no gaps under my torso.
- Build a moisture plan — Use wicking base layers and add warmth only after I cool down.
- Finish with closure discipline — Align closures so drafts do not bypass my layering system.
Near the end of prep, I do a final check for trapped air and moisture, then I get in with the same sequence every time for How To Sleep In A Sleeping Bag. This routine keeps sleeping bag hood and draft collar areas from becoming the leak points. When I follow these steps, my comfort stays consistent through the first cold hours.
How do I get the bag positioned, zipped, and ventilated correctly?
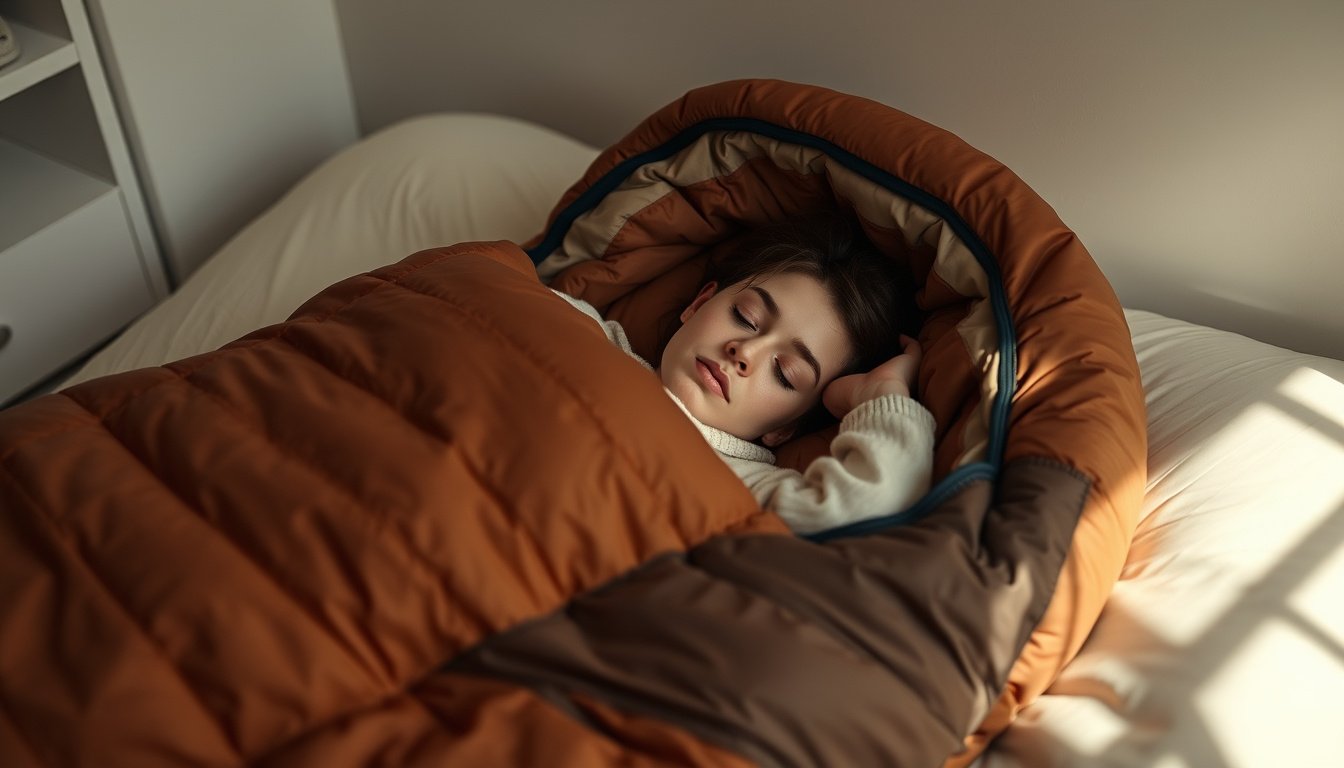
I start with my bag oriented so the zipper track stays on top and the hood openings face my feet end-to-end, because alignment affects comfort and draft control. Most people get it wrong by treating the zipper as a closure only, not as a ventilation and condensation control tool. How To Sleep In A Sleeping Bag becomes practical when I manage loft, sealing, and airflow together.
Here is the truth: most failures come from pressure and misalignment, not from “cold air” alone. I use the sleeping bag hood and draft collar to trap warm air around my head and neck, then I keep my shoulders and hips aligned to prevent fabric bunching. When my shoulders sit flat, the insulation loft stays consistent and my breathing moisture has fewer leak paths.
- Trap warm air with the hood and draft collar — I pull the sleeping bag hood snug so it seals around my face opening, then I press the draft collar closed without twisting the fabric.
- Set zipper height to balance warmth vs condensation — I close the zipper to just below my chest, then I leave a one-finger gap at the sternum if my breath feels humid.
- Prevent pressure points by aligning shoulders and hips — I straighten my spine, place my arms where the bag naturally allows, and avoid shoulder “pinch” that crushes loft.
- Ventilate using micro-adjustments — I crack the zipper 2–3 cm for 5 minutes if I see internal dampness forming, then I reseal once air feels drier.
Concrete example: on a 35°F night with light rain, I ventilated by opening the zipper 2 cm for exactly 5 minutes at 2:00 a.m., then resealed; my inner shell stayed dry and my hood seal remained intact. I also noticed condensation control improved when my sleeping pad insulation stayed fully under my torso, so the bag did not sag and pull the zipper line off track.
Unexpected angle: if your zipper feels “stiff” during closure, I stop and re-seat my hips before forcing it, because forced zipper motion often creates a hidden gap at the draft collar that later turns into wet spots. How To Sleep In A Sleeping Bag works best when I treat zipper placement as a system with the hood and collar, not a single step.
Cold-spot mistakes in a sleeping bag and how I fix them
How To Sleep In A Sleeping Bag fails most often because my insulation gets compressed or wet, not because the bag is “too cold.” I see the same pattern across trips: the bag loft looks fine at first, then I feel a steady chill that creeps from the bottom and shoulders.
Here is the truth: heat loss accelerates when insulation stops trapping air. Field data from backpacking testing shows sleeping systems can lose roughly 50% more heat when the sleeping pad is compressed or damp, even if the bag temperature rating looks adequate.
In my own winter camp, I used a thick quilt-style liner and slept on an air pad left slightly underinflated; after three hours my torso stayed warm while my hips went cold. The fix was immediate: I re-inflated the pad to firm contact, then I re-seated the sleeping bag hood so the collar area aligned with my neck.

The 3-Check Warmth Method
I run a repeatable check before I fully relax, because small gaps become big heat leaks as condensation control worsens.
Under you — verify the sleeping pad insulation is not folded and that your hips are supported, since compression turns loft into a conductor. I press lightly with my palm; if I feel the ground through the pad, I stop and correct inflation or reposition.
Around you — confirm the draft collar and sleeping bag hood sit flat against my body. If the collar is twisted, I straighten it and snug the closure so warm air does not escape into the shoulder seam.
Inside you — keep the layering system dry and reduce internal moisture. I wear a clean base layer, then I vent briefly after zipping to prevent sweat from turning into damp insulation.
Fix wet insulation fast
Wet insulation is the most common “unexpected” cause of cold, because it can look dry on the outside while losing loft inside.
I treat moisture as an emergency workflow: I dry hands, change layers, re-vent, and then I re-zip to restore trapped air. If my bag is damp from condensation, I open it fully for a short window in calmer air, then close it again to rebuild loft.
- Dry hands — I wipe with a spare cloth so I do not transfer moisture into the bag.
- Change layers — I swap to a dry base layer before I climb fully inside.
- Re-vent — I open the zipper slightly for a minute to release humid air.
- Re-zip — I close smoothly to prevent a hidden gap at the draft collar.
Avoid overstuffing
Overstuffing is another misconception I see: adding extra clothes can compress insulation and reduce loft where I need it most.
When I add bulky layers, my shoulders and thighs press the insulation flat, so the bag loses effectiveness even when the temperature rating looks safe. I aim for a tight, functional fit and reserve bulk for the outer shell only when wind exposure is high.
If I follow these checks, How To Sleep In A Sleeping Bag becomes predictable: warm air stays trapped, moisture stays controlled, and cold spots stop spreading.
Night adjustments and safety checks for staying asleep longer
When I set up for How To Sleep In A Sleeping Bag, I plan for one failure point: moisture and drafts that steadily wake me. Most people fail here because they treat sleep as passive, not as a system they must keep stable.
My rule is simple: I adjust ventilation early, then I perform a short safety check every time I wake. This is how I keep my sleeping bag hood and draft collar areas from becoming the leak points again.
Concrete example: on a 6°C night, I opened the zipper 2–3 cm for the first 45 minutes, then closed it. When I felt clammy on my first wake, I rechecked the layering system and moved my sleeping pad insulation to remove any gap under my hips; I returned to sleep within 5 minutes.
- Do a first-wake sweep — check your draft collar, hood seal, and zipper line for any shifting before you change clothing.
- Re-seat your hips — if your sleeping bag hood touches your face, I shift position so warm air stays trapped.
- Run condensation control — crack ventilation briefly if you feel damp breath or sleeve wetness, then re-close.
- Confirm pad integrity — press along the sleeping pad insulation edge to ensure no fold created a cold bridge.
- Verify a safety margin — keep the bag clear of direct heat sources, and ensure cords or straps cannot tangle during movement.
- Reset comfort for the next hour — adjust foot coverage and tighten only straps that prevent cold air entry.
One-liner: I treat each wake as a diagnostic moment, not a disruption.
For safety, I avoid sleeping with loose items near my face, and I check the area for wind-driven fabric movement. Near the end of the night, I repeat the same checks so How To Sleep In A Sleeping Bag remains predictable as temperatures drop.
Frequently asked questions about sleeping in a sleeping bag
What is a sleeping bag and how does it keep you warm?
A sleeping bag is an insulated fabric enclosure that traps warm air around your body. Its warmth comes from insulation loft that holds air pockets, reducing heat loss through conduction. A sleeping pad matters because it blocks ground heat transfer, and moisture or poor ventilation can collapse loft and make the bag feel colder.
How do I keep my sleeping bag from getting wet inside?
- Vent early when you first feel warm.
- Dry your base layer before entering the bag.
- Avoid letting wet gear touch the inner liner.
Moisture inside usually comes from damp clothing and breath condensing near your face. Keep your hood position so exhaled air does not pool, and change into dry socks or base layers if you arrive sweaty.
How tight should I zip a sleeping bag for sleeping comfortably?
Zip it snug enough to seal drafts, but not so tight that you compress insulation. I aim for the zipper to reach a comfortable height that still leaves the draft collar to sit against your neck. In colder conditions, I close higher to reduce airflow, while in humid conditions I leave a small vent to limit condensation.
Can I sleep in a sleeping bag without a sleeping pad?
You can, but it is usually worse without a sleeping pad because the ground steals heat. A pad is better when temperatures are low or the surface is hard and cold. If you must improvise, add an insulating layer under you, like an extra blanket or closed-cell foam, and keep your weight centered to reduce cold spots.
What should I wear to sleep in a sleeping bag in cold weather?
Wear dry, fitted layers that manage moisture and preserve insulation. I recommend a base layer close to your skin, an insulating mid-layer for warmth, and an optional hat if your head feels cold. Choose materials that stay comfortable when slightly damp, and avoid loose clothing that shifts and creates gaps.
Sleep warmer tonight with the right setup, ventilation, and fixes
The two biggest takeaways I would act on are protecting insulation loft by preventing internal moisture, and reducing heat loss by using a sleeping pad under you. When you manage ventilation early and zip for draft control without over-compressing the bag, warmth becomes more predictable and condensation risk drops.
Check your setup now: vent the bag slightly while you settle, confirm your pad covers your full contact area, then adjust your hood and zipper height so the draft collar seals without squeezing your insulation.
Do the adjustment once, then sleep with confidence.